Showing posts with label furniture makeovers. Show all posts

Wednesday, October 3, 2012

Before & After: Pie Safe Makeover

china hutch before
Here is the makeover of a recent estate sale purchase...

china hutch after
It might be more appropriate to call this a "China Hutch Makeover" or a cabinet makeover of some sort... I'm not really what this piece of furniture started out as. A cabinet with legs. It did have glass in the doors, along with some wood decoration behind the glass, but my overzealous husband took those out before I could take the before photo.

I replaced the glass with a wire mesh after deciding chicken wire wouldn't be sturdy enough, so it definitely ended up more "pie safe" then "china hutch", so that's what we're calling it! The mesh also matches my food pantry.
pie safe
What do you think? The interior is some kinda off-white discount paint from the "oops paint section. If you recognize the outside, turquoise color, that's because it's my Behr Mint Majesty leftover from the dining chairs... kind of. I had to add some more oops paint, this time in a blue, in order to stretch it to have enough for another project. Plus, since this turquoise china hutch is in my kitchen, I didn't want it all match-matchy with my dining chairs.

I found a birdcalling book at the thriftstore, but the bird call mechanism was broken while the illustrations were awesome. So, I totes "Put a Bird On In It", lining the drawer with the bird pictures.

I'm usually not for painting over wood (unless it's 80s yellow/orange,  or 70s speckled brown), but this wood was all discolored, chipping, warped, and all around in bad shape. So much so that I got this for just $20 (and a second one for the same price) at an estate sale.
pie safe before after
The cabinet was $20 and the paint I had on hand. The only thing I bought new was the hardware (from OSH) and the wire, which also came from OSH and ended up a much better deal than the ol' Orange Big Box, because they let you buy it buy the foot at Orchard.

Wednesday, July 25, 2012

DIY chalk paint dining chairs

After the dining table was completed and in place, it took us weeks to find dining chairs. I was set on finding some metal Tolix style knockoffs, and was probably going to buy some from Overstock.

But then my husband brought home four chairs from a yardsale for just five bucks for the lot.  Yes, the same husband ( I do only have one, afterall) who bought two desks for $10 from a different yardsale.

The four chairs were three matching blond/yellow wood ones (sorry, I forgot to take before pictures!) and a fourth black one (that one lives by the computer now).
behr mint majesty
I've already mentioned our small dining area is a challenge to find furniture for, and it was going to be an even bigger challenge to find the right-sized chair for the teeny dining table.

My husband had intended these chairs to be temporary, and I agreed; I hated their yellow-and-mildew color tones!

But as time wore on, I realized they were just the right size. And, we already had them anyway... time to mend and make do.
mint chalk paint chairs
First, I tried spraypaint. The Rustoleum Satin Green Apple just wasn't the right shade OR finish. So the lone spraypainted chair sat outside for a few days before I decided what to do next. That decision came to be chalk paint.

I probably don't have to tell you that Annie Sloan Chalk Paint is taking the web by storm. I was totally surprised to find that there's an AS retailer in my town, and was all prepared to pay for it.

But then, I got to thinking... I guessed it was around $35 bucks for a quart of Annie Sloan, and I was pretty close. These chairs were just $1.25 each. It seemed to sort of go against the frugal find that they were if I were to cover them in expensive paint. Plus, there wasn't the right shade of minty green on the AS color chart.

I'd already been seeing all the DIY chalk paint recipes when this post popped up on Apartment Therapy. Most recipes have you mix Plaster of Paris, water, and latex paint in precise measurements and ratios, but the one on AT said the gal kinda winged it until she found a consistency she liked. Works for my lazy artsy, go-with-the-flow self.

I planned on using the lines on the side of my quart container to make pretty precise measurements, and filled Plaster of Paris up to the first line. I thought I was putting water up to the second line when I noticed there was way too much water.

Instead of dumping out the water and PoP to start over like I should have, I went ahead and added my paint, Behr latex paint and primer in one in the color "Mint Majesty". It took a lot of paint to catch up to all the water, and I got a very watery DIY Chalk Paint mixture to work with.

Still, I loved how my first chair came out. I'd done minimal sanding and hadn't technically primed it, which is a supposed benefit of chalk paint-- especially if you're using the real Annie Sloan deal. But it HAD been painted with that apple green Rustoleum, which was acting like a kind of primer.

The next two chairs were another story. With having a little one, I didn't get to do all three at once. So my DIY chalk paint mixture sat overnight. Maybe I should have Googled whether or not leftover DIY chalk paint keeps.

By the next day, the PoP had settled to the bottom in a thick layer. The water was on top. I mixed it up and started painting anway.

I love the color of all three chairs, although I think the first one came out more saturated because of the layer of apple green underneath. But the second two also came out with some large glops of PoP here and there thanks to the day-old mixture. There are brush strokes on the seats, while the first one came out with a smooth seat.

I distressed all three before finishing them off with a couple of layers of Minwax pastewax.

The verdict: I might use DIY chalk paint again, but not for any projects I have in my current queue. This hasn't turned me off from trying the real ASCP, but I think the price for AS has. I like my Behr latex paint and primer in one and plan on mostly sticking with that.

Tuesday, July 24, 2012

Before & After: Dining Table Makeover

Our dining area in our small eat-in kitchen is a challenge to get just the right-sized table for.

We'd first bought an awesome mahagony table off Craigslist for just $40... and it ended up being way too big.
farmhouse table before after
So we snatched this table up when we saw it at the thrift store. It was priced higher than I wanted to pay for a rinky-dink table like this, even on sale, but it was the right size for the space.

My husband chose to remedy the yellow/orange wood with a coat of dark stain on the top using an all-in-one stain/poly, and spray-painted the base white. Now we have a perfectly-sized little table, and we didn't have to sacrifice looks to do it.

Tuesday, May 22, 2012

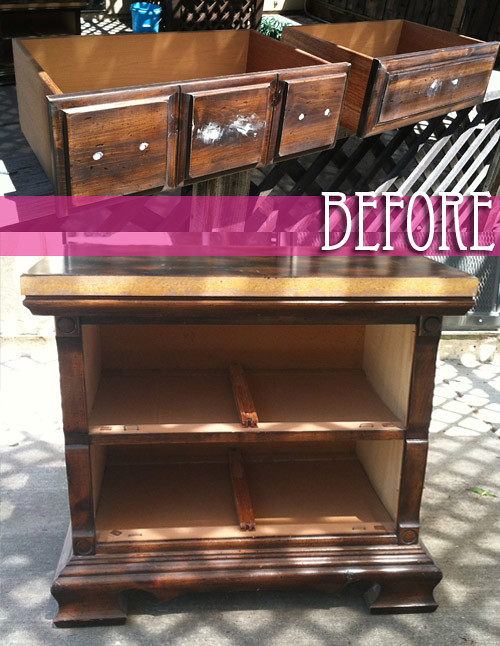
Before & After: DIY Vintage Nightstand Makeover

nightstand makeover before
Shabby chic: ya either love it or ya hate it.

I happen to love it... as long as it's not total overboard like you're living in some countryside Northeastern (1980s) bed and breakfast. I like the muted whites and florals that the look is known for, but I also love color and other graphic prints too much to go full-on with it.

And of course I love vintage, retro, antique... just plain OLD stuff. Always have. So that's perhaps what I find most appealing of all about the SC aesthetic. The aged, loved, worn, and yes, distressed (even it's it's faux distressed) fabrics and woods.

Don't be hatin'.

Among the old things I don't love: 1970s veneer. So when I bought this nightstand, I full intended on painting it all along.

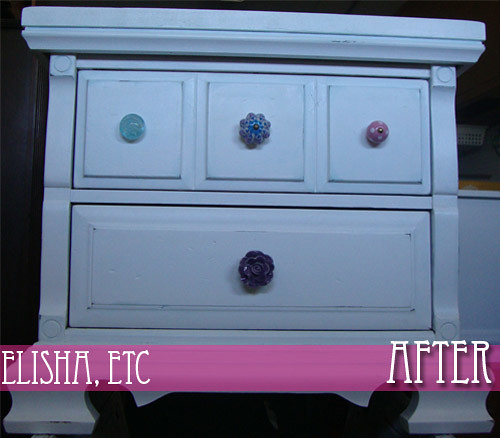
And here she is now!
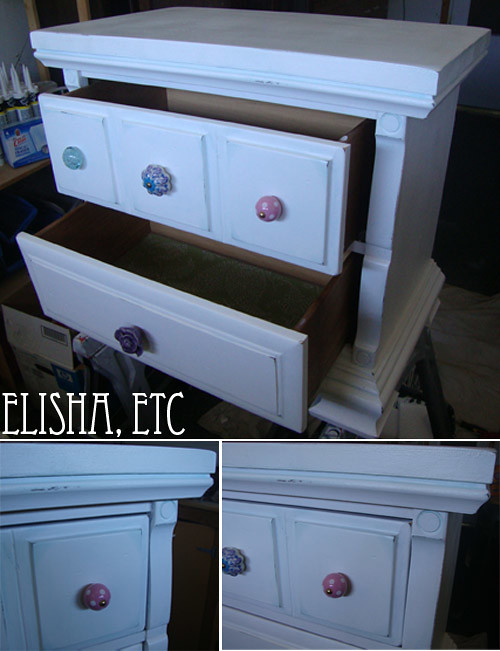
nightstand makeover after 2
I know you've seen these "white with distressed paint" makeovers all over the blogosphere so it's nothing really special, but I'm really happy with it!

It was my first attempt at making over a piece of furniture. Oh, I've painted plenty of stuff, but I've never sanded, primed, chosen new hardware, done specialty finishes like faux distressing and blue washes, then sealed.

My previous endeavors were "paint over the old paint until you can't see said old paint any longer aaaaannd.. done".

It'll now live next to my bed and probably hold some sewing stuff spilling over from my craft nook. I hope I get to do more projects like this in the future! nightstand makeover after 1

Comments system

Disqus Shortname